Directory Sync


Directory Sync
Facilitate the adoption of your application with automatic, real-time user provisioning and deprovisioning. Synchronize your solution with your customer’s user directory via simple Webhooks. IT Admins have to manage the lifecycle of employee access to third-party applications, as they enter and leave the organization. They use Identity and Access Management (IAM) tools, such as Microsoft Entra ID, Okta or Google Workspace, to manage their users' access to third-party software. Directories enable IT administrators to activate and deactivate accounts, and create groups that define access rules. With Cryptr, you’ll receive in your application a “before/after snapshot” of data changes each time users and groups evolve within their organization’s IAM solution.
- Quickstart
- 15 min
In this guide, we’ll help you from activating your Directory Sync for an Organization to provisioning your first user in your own application.
Before Starting
Create your free Cryptr account now, and you will have the necessary element to follow this guide.
- Organization: You will create your first organization, which could be your customer or even yourself for the first test. Learn more about Organization.

1. Activate Your First Directory Sync
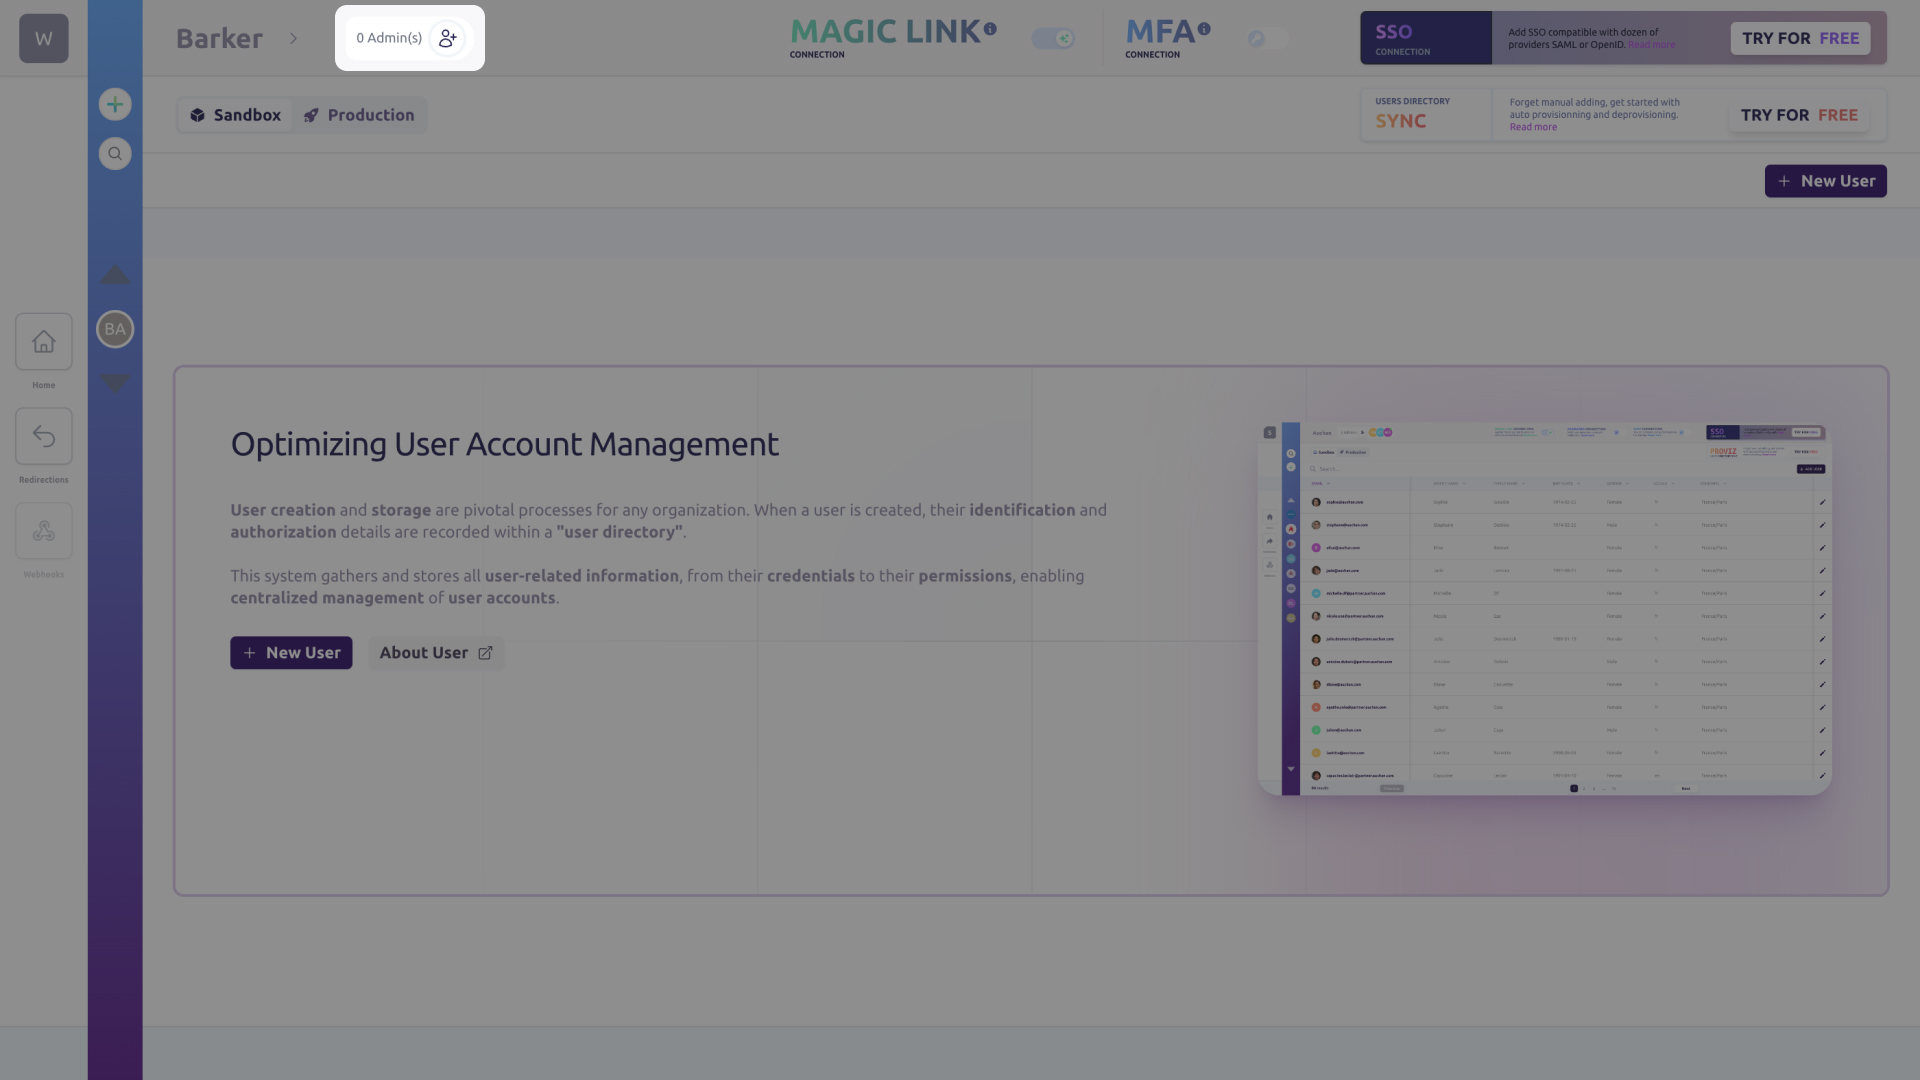
To enable Cryptr synchronization between you and your customer’s Identity Provider (IdP), you need to activate “Directory Sync” for the organization you wish to synchronize. You can select the Organization via the blue side navigation bar on the left of your screen.

To start the Directory Sync configuration process, click the Directory Sync TRY FOR FREE button at the top right of your screen. Once activated, the Directory Sync section of the administrator configuration portal will be available to the admin of this Organization. The administrator is the designated contact of the client company responsible for Identity and Access Management (such as with Microsoft, Okta or Google).
2. Create Your Webhook
Create an API Endpoint to Receive Data
You need to create an API endpoint (e.g., /directory-sync) in your application that will listen for Cryptr's HTTP POST API requests and act as a receiver for your provisioned user data.
- Javascript
- PHP
- Python
- Ruby
// This example uses Express to receive webhooks
const express = require('express');
const app = express();

// Match the raw body to content type application/json
// If you are using Express v4 - v4.16 you need to use body-parser, not express, to retrieve the request body
app.post('/directory-sync', express.json({type: 'application/json'}), (request, response) => {
  const event = request.body;

  // Handle the event here
   console.log(event)

  // Return a response to acknowledge receipt of the event
  response.json({received: true});
});

app.listen(8000, () => console.log('Running on port 8000'));
$payload = @file_get_contents('php://input');
  $event = null;

  try {
      // Handle the event here
      $event = json_decode($payload, true);
  } catch(\UnexpectedValueException $e) {
      // Invalid payload
      http_response_code(400);
      exit();
  }

  http_response_code(200);
import json
from django.http import HttpResponse

# Using Django
@csrf_exempt
def my_webhook_view(request):
  payload = request.body
  event = None

  try:
    # Manage event here
    event = json.loads(payload)
  except ValueError as e:
    # Invalid payload
    return HttpResponse(status=400)

  return HttpResponse(status=200)
require 'sinatra'
require 'json'

post '/directory-sync' do
  # Handle the event here
  puts request.body.read
end
Create a Webhook from the Dashboard
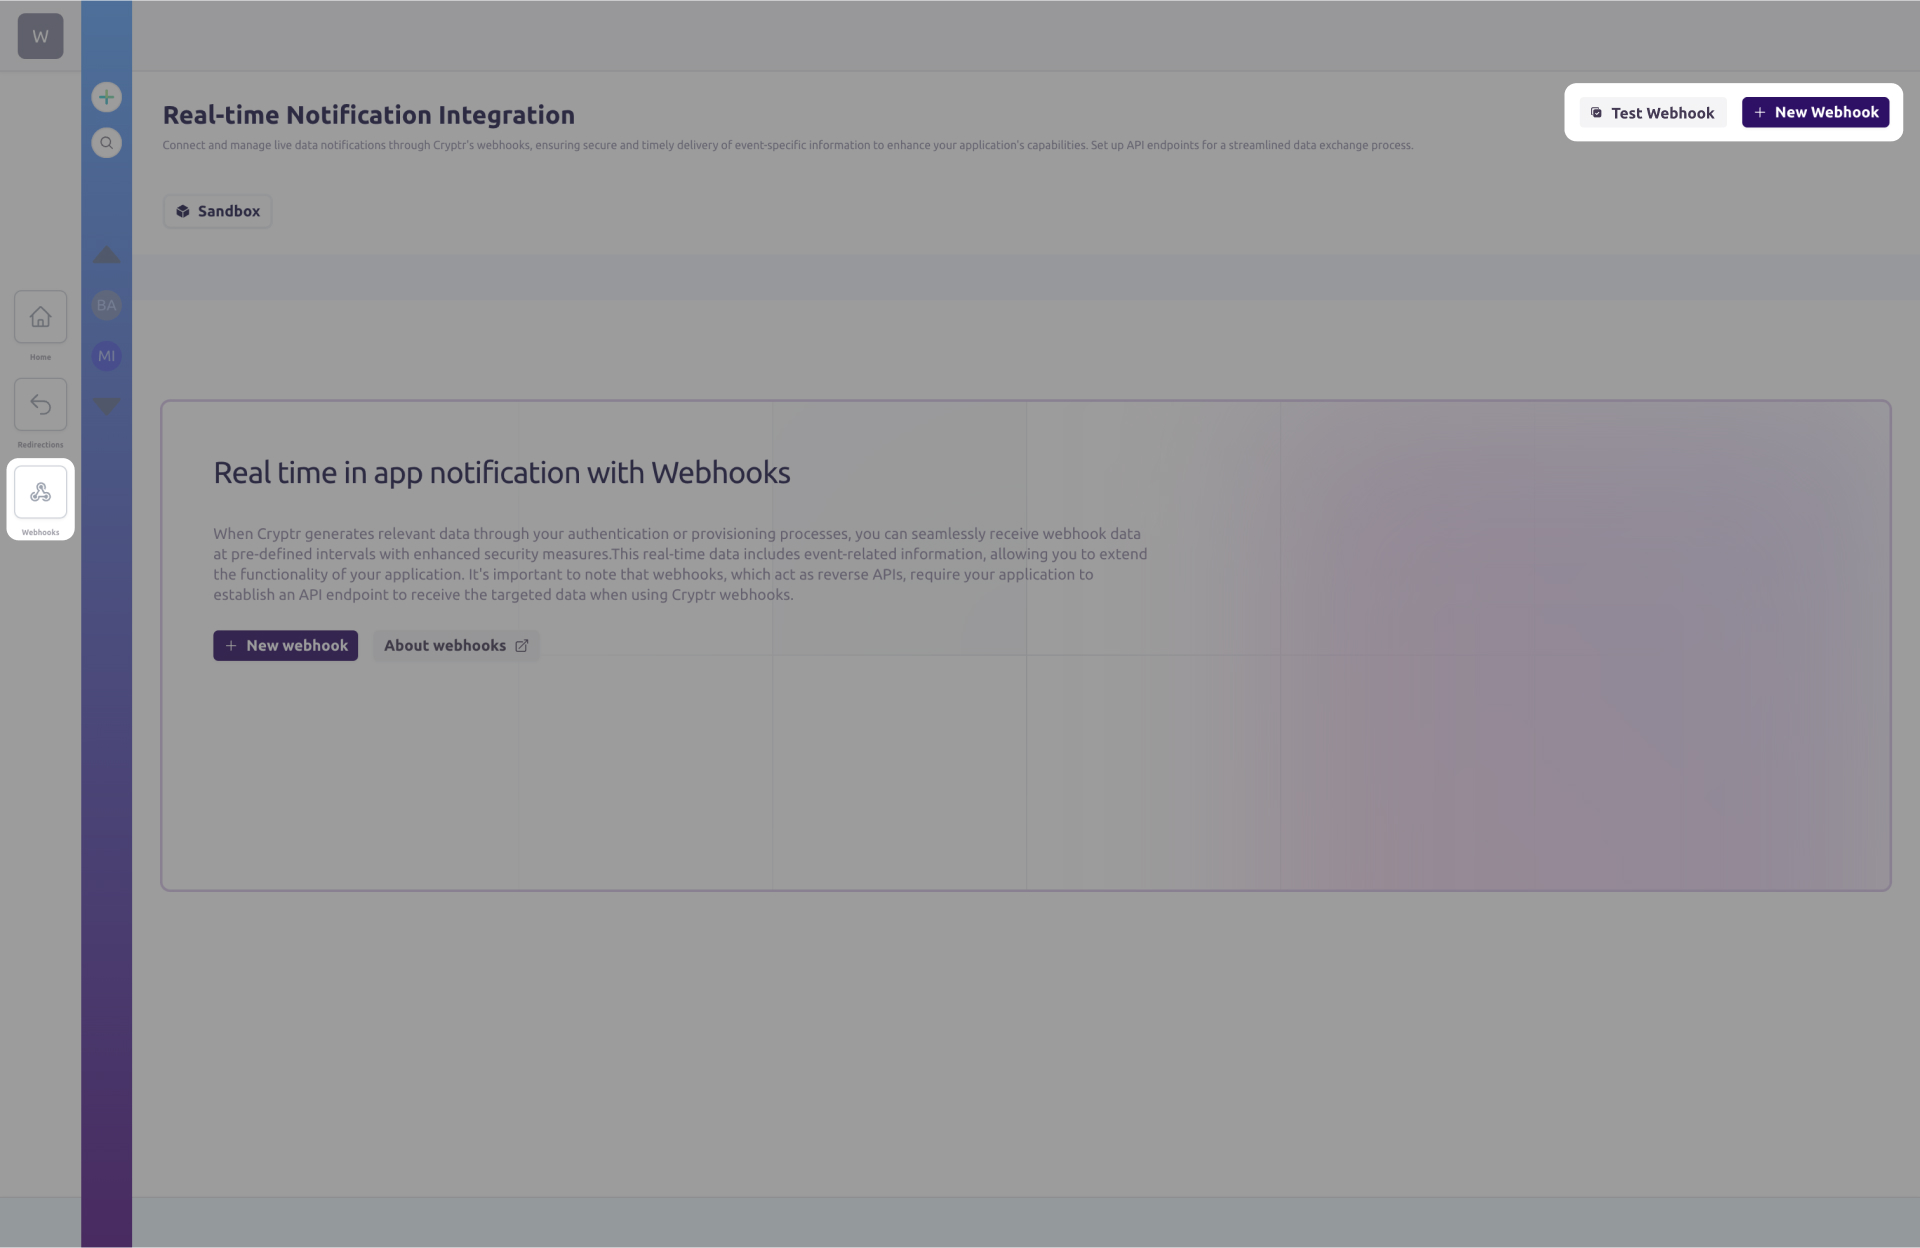
Click on the “Webhooks” button in the navigation bar on the left of your screen. You can create and test a webhook by clicking on the “New Webhook” and “Test Webhook” buttons.
New Webhook
A modal window will appear to guide you through the creation of your webhook.

Test Your Webhook
You can check response from your API endpoints by triggering an event on your sandbox webhooks. A modal window will appear to guide you through the testing of your webhooks.

3. Setup to Test Synchronization by Yourself
If you’re not using an identity manager, you’ll need to create an account with an identity and access management solution, similar to those used by your customers. Even if you already have an identity manager, we recommend creating a free Okta account to test the Cryptr Directory Sync configurator.
You will need a fully configured SCIM (System for Cross-domain Identity Management) sync with an enterprise identity provider to test synchronization. This means you must act as your own customer administrator and carry out the configuration yourself. This will allow you to grasp the process your customers will do during their onboarding. 😎
Next, on the Organization screen in your Cryptr dashboard, you must invite yourself using your own email address in order to impersonate the Organization’s IT administrator. To do so, click on the button next to the administrator number at the top of the screen to the right of the Organization name.
You will receive an access link via email. Simply click on it to access the Directory Sync configuration portal for your organization. This portal is reserved for the IT administrators of your customers, who will be able to configure the synchronization with your application autonomously. It allows Cryptr to exchange useful information between Cryptr’s and your customers’ Sync solution, such as configuration secrets and certificates. The Cryptr Directory Sync configurator is an interactive tutorial that is regularly updated.

At the end of your setup, the configurator will prompt you to validate your settings. Your Directory Sync is perfectly configured, and you’re ready to integrate directory synchronization for this Organization into your application.